Painting diecast cars with acrylics is a rewarding hobby that allows you to customize and bring your miniature vehicles to life. Whether you’re a beginner or have some experience, achieving a professional-looking finish requires the right approach, tools, and techniques. This guide provides a comprehensive walkthrough to help you master the art of painting diecast cars. From selecting the perfect paints and prepping the surface to applying detailed finishes and protecting your work, we will cover every essential step, ensuring your models look stunning.
Choosing the Right Acrylic Paints and Tools
The foundation of any successful diecast painting project starts with the right materials. Acrylic paints are ideal for model painting because they dry quickly, have low odor, and are easy to clean up with water. When selecting acrylic paints, consider the following aspects for the best results. High-quality acrylic paints from reputable brands are generally preferred. These paints offer superior pigment concentration, resulting in richer colors and better coverage. Look for paints specifically designed for modeling, as they are often formulated to adhere well to plastic and metal surfaces. A range of colors is necessary to achieve various finishes, allowing for a great color selection and blending capabilities. Consider purchasing a basic set of primary colors, plus black and white, and then supplementing them with any specific colors needed for your projects. Different brands offer varying finishes such as matte, satin, and gloss. Choose the finish that suits the desired aesthetic of your model. Remember that you can always add a clear coat to achieve the desired gloss level.
Selecting the Best Acrylic Paint Types for Diecast
Within the realm of acrylics, several types are particularly well-suited for painting diecast models. Acrylic lacquer paints are a popular choice due to their excellent durability and resistance to chipping. They typically offer a smooth, self-leveling finish that can be easily polished. Enamel acrylics combine the benefits of acrylics with the durability of enamels. These paints often provide a hard, glossy finish and are great for detailed work. Water-based acrylics are versatile and easy to use, perfect for beginners. They dry quickly and are less prone to the toxic fumes associated with some other paint types. When choosing the best acrylic paint type, always consider factors such as your skill level, the desired finish, and the specific requirements of the project. Experimenting with different types will help you discover which ones work best for your techniques and preferences. Don’t be afraid to try out different brands to see which ones meet your needs.
Essential Tools for Diecast Painting

Having the right tools is just as important as choosing the correct paint. A good set of tools will make your painting process easier and deliver better results. Here’s what you’ll need. High-quality paintbrushes in various sizes are critical for applying paint precisely. You will need brushes for base coats, detailing, and touch-ups. Consider synthetic brushes for acrylics, as they are easy to clean. An airbrush, while optional, can significantly improve the smoothness and evenness of your paint application. It is especially useful for large surfaces and achieving a professional finish. An airbrush requires an air compressor and proper ventilation. A palette or paint holder to mix and hold your paints, ensuring that you don’t waste your paint. This can be a dedicated palette or even a ceramic plate. A hobby knife or craft knife to remove parts from the sprue and to trim any excess plastic. Fine-grit sandpaper for smoothing surfaces and preparing for painting. A well-lit workspace is crucial, especially when working on detailed projects. Good lighting helps you see imperfections and ensure an even application of paint.
Surface Preparation Is Key
Preparing the surface is probably the most critical step in the process. Thorough preparation ensures that your paint adheres properly and results in a smooth, professional finish. Here is what you should do before applying paint. Begin by carefully disassembling your diecast model. Remove all detachable parts, such as wheels, windows, and any accessories. This makes it easier to paint each component evenly. The surface of the diecast model is usually covered with a protective coating, which must be removed. Start with a thorough cleaning with warm water and dish soap. This will remove any dirt, grease, or oils. Use a soft brush to scrub the model gently. Rinse the model with clean water and let it dry completely. Any imperfections on the surface of the model will show up after painting, so spend time to address those imperfections. Gently sand the model using fine-grit sandpaper (600-800 grit). Pay attention to any raised areas, imperfections, or mold lines. Sand carefully and evenly to create a smooth surface. After sanding, clean the model again to remove any dust or debris. Use a tack cloth or a clean, lint-free cloth to wipe the surface.
Cleaning and Degreasing Your Diecast Model
Cleaning and degreasing is essential for removing any contaminants that could interfere with paint adhesion. Start by washing the model thoroughly with warm, soapy water. This removes surface dirt, dust, and oils that have accumulated during manufacturing or storage. Rinse the model with clean water and let it dry completely. For a more thorough clean, you can use a dedicated degreaser. Apply the degreaser according to the manufacturer’s instructions, and then rinse and dry the model thoroughly. Ensure you have removed all grease, oil, and other residues to create a clean surface for paint. The key is patience; take your time and repeat the process to make sure your diecast is spotless and ready for painting.
Sanding and Priming for Optimal Adhesion

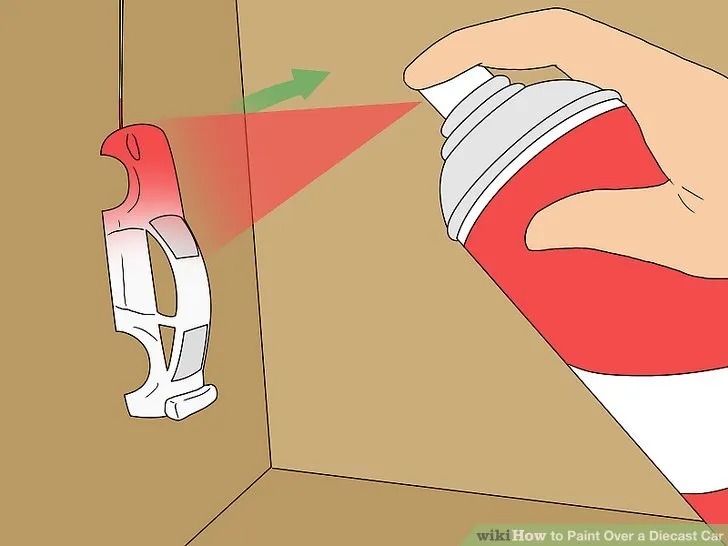
Once the diecast model is clean, the next critical step is sanding and priming. Sanding the surface will improve adhesion. It creates microscopic texture that allows the paint to grip the metal. Begin with fine-grit sandpaper (around 600-800 grit) and gently sand the entire surface of the model. Pay special attention to any areas with imperfections or mold lines. After sanding, clean the model again to remove any sanding dust. Priming provides a base for the paint and helps it to adhere to the metal. It also fills in small imperfections and creates a uniform surface. Apply a thin, even coat of primer using an airbrush or spray can. If using a spray can, hold it about 6-8 inches away from the model and use short, controlled bursts to avoid drips. Let the primer dry completely according to the manufacturer’s instructions, and then lightly sand the model again with fine-grit sandpaper to smooth out any imperfections.
The Acrylic Painting Process
With the model properly prepared, you can now begin the painting process. This section will guide you through applying base coats, layering colors, and adding details. Always work in a well-ventilated area, and wear a respirator to protect yourself from paint fumes. Start with the base coat, which provides the primary color for your model. Apply thin, even coats of paint, allowing each coat to dry completely before applying the next. Multiple thin coats are better than one thick coat, as they reduce the chance of drips and imperfections. Once the base coat is dry, you can start layering colors to create depth and dimension. Use different shades of the same color or complementary colors to add highlights and shadows. This is where your creativity can shine, allowing you to add details to your model.
Applying Base Coats Evenly
The base coat is the foundation of your paint job, so it’s essential to get it right. Using an airbrush will provide the best results. Start by thinning your acrylic paint according to the manufacturer’s instructions. If you are using an airbrush, ensure the air pressure is correct. Apply the paint in several thin, even coats. Hold the airbrush a few inches away from the model and use smooth, controlled strokes. Avoid spraying too much paint at once to prevent drips or runs. Let each coat dry completely before applying the next one. This usually takes about 15-30 minutes, depending on the paint and environmental conditions. Check the coverage after each coat. It might take several coats to achieve full, even coverage. Once the base coat is dry, inspect the surface for any imperfections. Use fine-grit sandpaper to gently smooth out any rough spots or imperfections.
Layering Colors and Creating Depth

Layering colors is a technique used to create depth and dimension on your model, making it look more realistic. Use different shades of the same color or complementary colors to create highlights and shadows. For example, you can use a lighter shade of the base color to highlight raised areas and a darker shade to create shadows in recessed areas. Drybrushing is a popular technique used to add highlights and texture. Dip a dry brush into a small amount of paint and then wipe off most of the paint on a paper towel. Lightly brush the remaining paint onto the raised areas of the model. This will highlight the details and give the model a weathered look. Washes can be used to add shadows and accentuate details. Apply a thinned-down paint mixture to the model, allowing it to settle into the recesses and around the details. Use a clean brush or cotton swab to remove any excess wash. Experiment with different layering techniques to achieve the desired effect.
Detailing Techniques for Realistic Finishes
Detailing is where you can really bring your model to life. There are several techniques you can use to add details. Use fine-tipped brushes or paint pens to add details such as trim, badges, and emblems. Steady your hand and work slowly to avoid mistakes. Weathering techniques can make your model look more realistic by simulating the effects of wear and tear. Use washes, drybrushing, and pigments to create the desired effect. Applying washes helps to emphasize panel lines and other details. Use a very thinned paint to fill the lines and other details. Let it dry, then wipe away the excess. Decals can add realism to your model by including sponsor logos, manufacturer badges, and racing stripes. Carefully apply decals to the model’s surface using decal setting solutions to ensure they adhere correctly. Always seal your decals after application with a clear coat to protect them. Practice and patience are the keys to mastering these detailing techniques.
Adding Decals and Finishing Touches
Decals and finishing touches can dramatically enhance the overall appearance of your diecast model. Decals come in various sizes, designs, and types. Some are water-slide decals, and others are adhesive. Before applying decals, ensure the surface is clean and smooth. Cut out each decal as close to the printed image as possible, and prepare a small dish of water. For water-slide decals, dip the decal into the water for a few seconds. Once the decal separates from the backing paper, carefully slide it onto the model’s surface. Use a soft cloth or cotton swab to gently remove any air bubbles and excess water. Allow the decals to dry completely before applying a clear coat. Finishing touches can further refine the model’s appearance. Weathering techniques can make the model look more realistic by simulating the effects of wear and tear. Apply a clear coat to protect your decals and finish the model. This also helps to blend everything together.
Sealing Your Work Protecting the Paint

Sealing your work is crucial for protecting your paint job and giving it a professional finish. A clear coat provides a protective layer that shields the paint from scratches, UV rays, and other environmental factors. It also helps to even out the finish and make the model look more polished. Different clear coats offer various effects. Matte clear coats provide a non-glossy finish, satin clear coats offer a subtle sheen, and gloss clear coats give a shiny, reflective surface. Before applying the clear coat, make sure your model is completely dry and free from any dust or debris. Apply the clear coat in thin, even coats using an airbrush or spray can. Allow each coat to dry completely before applying the next one. Once the clear coat is dry, you can gently polish the surface to remove any imperfections. Proper sealing is a great way to protect your model and finish your work.
Different Clear Coats and Their Effects
Clear coats come in different finishes, each offering a unique aesthetic. Matte clear coats provide a non-glossy, flat finish. They are ideal for models that require a realistic, subdued look. Satin clear coats offer a subtle sheen, somewhere in between matte and gloss. These are great for a balanced look. Gloss clear coats provide a shiny, reflective finish. They are great for show cars. Before applying a clear coat, consider the overall look you are trying to achieve. The type of clear coat should match the specific model. Different clear coats can affect the final appearance of your model. Choose the right clear coat to enhance and protect your paint job. Consider experimenting with different clear coats to find the best results.
Maintaining and Displaying Your Painted Models
Once your diecast model is painted and sealed, proper maintenance and display are essential to preserve its beauty. Dust your models regularly using a soft brush or a microfiber cloth to remove any dust or debris. Be careful not to apply too much pressure, as this could damage the paint. Avoid placing your models in direct sunlight, as UV rays can cause the paint to fade over time. Display your models in a dust-free environment, such as a display case. Display cases protect your models from dust and physical damage. Handle your models carefully and avoid touching the painted surfaces. Always handle your model by the chassis or other non-painted parts. With proper care and display, your painted diecast models can last for years, allowing you to enjoy your work and proudly display your collection.
Painting diecast cars with acrylics is a rewarding hobby that combines skill, patience, and creativity. By following the steps outlined in this guide, you can achieve professional-looking results and transform your model collection. Remember to start with the right materials, prepare the surface thoroughly, and apply the paint with care. Experiment with different techniques, and most importantly, have fun. With each model you paint, you will refine your skills and develop your unique style, creating a collection that reflects your passion and craftsmanship.