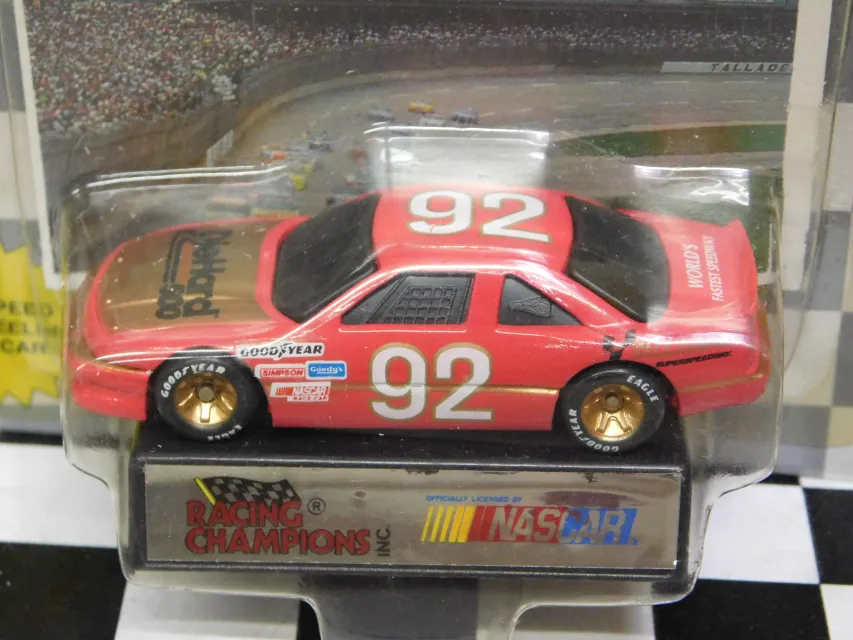
What is Custom Racing Diecast?
Custom racing diecast cars are miniature, modified versions of real-life race cars, meticulously crafted by enthusiasts. These aren’t your average toy cars; they are highly detailed models, often representing specific race cars, drivers, or racing events. The appeal of custom diecast cars extends far beyond mere collecting; it’s a passion that combines craftsmanship, artistry, and a deep appreciation for the world of motorsports. These miniature marvels are created by taking commercially available diecast models and transforming them through a variety of techniques like painting, detailing, and adding custom parts. This allows enthusiasts to create unique and personalized replicas, showcasing their individual creativity and knowledge of racing.
The Allure of Custom Diecast Cars
The allure of custom diecast cars lies in the ability to own a unique piece of automotive art. Each custom diecast represents a labor of love, a testament to the creator’s skill and dedication. These models offer an accessible way to engage with the world of racing, allowing enthusiasts to own and appreciate detailed replicas of iconic cars and drivers. The customization process itself is incredibly rewarding. It’s a hands-on hobby that allows you to express your creativity, learn new skills, and connect with a community of like-minded individuals. Moreover, the value of custom diecast cars can increase over time, making them a potentially valuable investment for collectors.
Why Customize Diecast Cars?

Customizing diecast cars offers several compelling advantages. First and foremost, it allows you to create something truly unique. Unlike mass-produced models, a custom diecast reflects your specific tastes, preferences, and the racing cars that resonate with you. It’s a chance to bring a personal touch to a hobby, making each model a reflection of your individual style. Customization also provides an opportunity to learn new skills, from painting and detailing to applying decals and modifying parts. It’s a rewarding process that enhances your creativity and provides a sense of accomplishment. Moreover, it’s an engaging hobby that brings the opportunity to connect with the diecast car community, exchanging ideas, tips, and showcasing your creations.
Choosing the Right Diecast Car
Choosing the right diecast car is the first step in your customization journey. The base model you select will greatly influence the final outcome of your project. Consider the scale, the level of detail, and the overall quality of the model. Popular scales include 1:18, 1:24, and 1:43, each offering a different level of detail and size. The more detailed the base model, the easier it will be to enhance it with custom features. Research different brands and manufacturers to find models that align with your goals. Examine the model for any existing flaws or imperfections before committing to your selection, this will help to have the best outcome possible.
Selecting the Perfect Base Model
Selecting the perfect base model is vital for a successful custom racing diecast project. Start by considering the scale, with 1:18 being a popular choice for its detail and size, 1:24 offering a balance of detail and manageability, and 1:43 ideal for space-saving collections. Identify the racing car or type you want to replicate, as this will narrow your search. Research different brands like Hot Wheels, Minichamps, or Autoart, known for their quality and accuracy. Examine the model’s details – panel lines, interior features, and overall construction – to gauge its potential for customization. Models with minimal pre-applied graphics and easily removable parts are generally preferred for easier modification. Finally, look for models with a solid reputation and positive reviews within the diecast collecting community.
Factors to Consider

When selecting a base model, consider several key factors. Detail is paramount, as a model with intricate features provides a better canvas for your customizations. Ensure the scale aligns with your preferences and display space. The availability of aftermarket parts, such as decals and wheels, for a specific model can simplify the customization process. Assess the ease of disassembly, as models with straightforward construction are easier to work with. Check the model’s build quality, ensuring all parts fit well and are free of manufacturing defects. Determine the model’s rarity or collectibility, as this can affect its value. Research the availability of reference materials, such as photos and specifications, to assist with your customization project. These factors will help you choose a base model that meets your needs and maximizes your customization potential.
Gathering Essential Tools and Materials
To begin customizing your diecast cars, you’ll need a range of essential tools and materials. Proper preparation will make the customization process easier and produce better results. Investing in quality tools will not only improve the outcome of your projects, but it will also make the process more enjoyable. From the basics like screwdrivers and hobby knives to more specialized tools like airbrushes and detail brushes, each item plays an important role in achieving the desired level of detail and finish. Careful selection of materials, such as paints, primers, and adhesives, is just as important as the tools, ensuring a smooth and durable finish. Gathering these items is an essential step in getting started with custom diecast cars, setting the foundation for successful and enjoyable projects.
Tools Required for Customization
A well-equipped toolkit is essential for custom diecast projects. A set of small screwdrivers, including Phillips head and flathead, is needed for disassembly. Hobby knives or X-Acto knives are used for trimming and detail work. Fine-tipped brushes are essential for painting details and applying washes. An airbrush and compressor offer superior paint finishes, though spray cans can be a more accessible alternative. Sandpaper in various grits is required for surface preparation and smoothing. Tweezers and small pliers aid in handling delicate parts. A cutting mat protects your work surface. A magnifying glass or head-mounted magnifier can help with intricate tasks. A drill with small bits allows for modifications and detailing. A well-organized workspace and a good lighting setup are also essential.
Materials Needed for Customization

The right materials are critical to the quality of your custom diecast cars. Acrylic paints are a popular choice due to their versatility and ease of use, with enamel paints providing a durable finish. Primers, specifically designed for plastic or metal, create a smooth base for painting. Thinners and solvents are needed for paint thinning and cleaning. Decals, available in various designs and scales, add detail and realism. Clear coats or varnishes protect the paint and decals. Glues and adhesives, such as super glue and epoxy, are necessary for assembling parts. Putty or filler can be used to fill gaps and imperfections. Sanding sticks and polishing compounds refine the finish. Masking tape is useful for creating sharp paint lines. Always select high-quality materials for the best results.
Preparing Your Diecast Car for Customization
Preparing your diecast car is a critical step in the customization process, laying the groundwork for a successful project. It involves careful disassembly, thorough cleaning, and surface preparation, all aimed at ensuring the paint adheres properly and the final result looks professional. This stage demands patience and attention to detail, and sets the stage for the rest of the project. The goal is to create a clean, smooth, and appropriately prepared surface that will accept paint and decals effectively. Correct preparation not only enhances the aesthetic outcome but also contributes to the durability and longevity of your custom diecast car.
Disassembly Process
The disassembly process is the first step in preparing your diecast car. Carefully remove all removable parts, such as wheels, mirrors, spoilers, and any interior components. Use appropriate screwdrivers and tools to avoid damaging the model. Take photos of the original model before disassembly to serve as a reference during reassembly. Store all parts in a safe place to prevent loss or damage. If parts are glued, use heat (a hairdryer on low setting) or a specialized adhesive remover to loosen the glue. Note the order of disassembly, as this will aid in reassembly. Work methodically and patiently, ensuring you understand how each part is attached. Carefully consider the methods for safe and successful dismantling.
Cleaning and Surface Preparation
Cleaning and surface preparation are key for a professional finish. Wash the disassembled parts with warm, soapy water to remove any grease or debris. Rinse thoroughly and allow the parts to dry completely. Use fine-grit sandpaper to remove any imperfections or blemishes from the surfaces, paying particular attention to areas that will be painted. If you’re removing existing paint, use a paint stripper or sand it off carefully. Apply a primer specifically designed for metal or plastic surfaces to create a smooth and even base for the paint. Inspect the surface for any remaining imperfections, and address them before proceeding. This preparation ensures optimal paint adhesion and a high-quality final result, enhancing the appearance and durability of the custom diecast car.
Painting Techniques and Strategies
Mastering painting techniques is crucial for achieving professional-looking results in your custom diecast projects. The right techniques, combined with quality paints and tools, can bring your vision to life and make your models stand out. From choosing the appropriate paint type to perfecting the application process, understanding these strategies will enable you to create stunning and realistic finishes. Proper painting techniques not only enhance the aesthetic appeal of your custom diecast car but also contribute to the overall quality and value of your work, elevating your models from hobby projects to miniature masterpieces.
Choosing the Right Paint
Selecting the appropriate paint is essential for achieving the desired finish. Acrylic paints are a popular choice due to their ease of use, quick drying time, and low odor. They’re water-based, making cleanup simple. Enamel paints offer superior durability and a glossy finish, but they require more careful handling and longer drying times. Lacquer paints dry quickly and provide a smooth, hard finish, but they release strong fumes. Consider the level of detail needed. For detailed work, consider using fine-tipped brushes and high-quality paints. The best choice depends on your experience and preferences. Always use a primer suitable for the chosen paint type to ensure proper adhesion. Test the paint on a scrap piece of plastic before applying it to your model to ensure that it creates the result you want.
Painting Process

The painting process involves several crucial steps. First, thoroughly clean and prepare the surfaces. Apply a primer, typically in thin, even coats, allowing it to dry completely between coats. Use multiple thin layers of paint, rather than one thick coat, to avoid runs or drips. If using an airbrush, maintain a consistent distance and pressure. For spray cans, use short, even bursts. Allow each coat to dry completely before applying the next, following the paint manufacturer’s instructions. Use masking tape to create sharp lines between colors. After the paint has dried completely, inspect the finish for any imperfections and address them. Apply a clear coat or varnish for added protection and shine.
Decaling and Detailing Your Diecast
Decaling and detailing are critical steps in transforming your custom diecast car from a blank canvas into a miniature replica. These steps add the final touches, bringing the model to life with realistic graphics and intricate details. Proper application of decals and attention to detail can significantly enhance the overall appearance and authenticity of your model. This stage is where you bring the character of the race car into your miniature creation, by carefully applying decals and adding intricate details that showcase the car’s personality and racing history. The final details are what separates a good custom diecast from an outstanding one.
Applying Decals
Applying decals requires patience and precision. Carefully cut out each decal, trimming away excess material. Submerge the decal in warm water for a few seconds to loosen the adhesive. Slide the decal from its backing and position it on the model. Use a soft cloth or cotton swab to gently press out any air bubbles and ensure the decal adheres smoothly to the surface. Apply decal setting solutions to help the decals conform to the contours of the model. Once the decals are dry, apply a clear coat to seal them and protect them from damage. Allow the clear coat to dry completely before handling the model. The careful application of decals is essential for achieving a professional-looking finish.
Adding Details and Finishes

Adding details and finishes brings the final touches to your custom diecast car. Use fine-tipped brushes to paint details like headlights, taillights, and interior components. Add washes to panel lines and other recessed areas to enhance depth and realism. Weathering techniques, such as dry brushing and washes, can simulate dirt, grime, and wear, adding authenticity. Consider upgrading the wheels and tires. Add racing details like sponsor logos, driver names, and race numbers. Apply clear coat or varnish to protect the finish and add a glossy or matte sheen. Attention to these details separates an excellent custom diecast from a good one. Focus on accuracy, realism, and your creative vision.
Reassembly and Final Touches
Reassembly and final touches are the culminating steps, where you bring all the individual elements of your custom diecast car back together. It’s a process that demands care and precision, ensuring that every part fits correctly and the model looks as intended. This stage requires a return to the skills that you’ve learned so far, carefully putting the car back together while refining every detail. These final touches ensure the model is not only aesthetically pleasing but also structurally sound and true to your vision. Patience and attention to detail at this stage will reward you with a beautifully finished model.
Ensuring Proper Fit
Ensuring a proper fit is essential during the reassembly process. Refer to the reference photos taken during disassembly to understand how the parts fit together. Carefully align all the components. Use appropriate adhesives like super glue or epoxy for the right parts, avoiding excessive amounts that could cause issues. Reattach any interior parts, such as seats, dashboards, and roll cages, aligning them with the body. Attach the wheels, ensuring they rotate freely. Use small screwdrivers to tighten screws. Check the alignment of all the components and ensure they sit flush against each other. Take your time, and if parts don’t fit easily, identify the problem and make necessary adjustments before forcing anything.
Final Inspection
Conduct a final inspection to ensure that all aspects of your custom diecast car meet your standards. Examine the paint finish for any imperfections, runs, or blemishes. Check the decals for any air bubbles or misalignments. Make sure that all parts are properly attached and secure. Inspect the details, ensuring all your custom components align with the model. Confirm the overall appearance matches your vision. Address any issues or flaws before considering the project complete. With a thorough final inspection, you can identify any areas that may need further refinement, ensuring your final product meets your expectations. This attention to detail will show your pride in the finished model.
Showcasing and Displaying Your Custom Diecast
Once your custom diecast car is complete, the next step is showcasing it, allowing you to share your work and passion with others. Displaying your creations can enhance their aesthetic appeal and protect them from damage. From dedicated display cases to custom dioramas, there are many ways to display your models. The careful selection of display methods will not only protect your collection but also allow you to celebrate your hard work and connect with other collectors. The display method is the final touch of your custom diecast car, showing off your dedication and craftsmanship.
Where to Display Your Diecast Cars
Choosing the right display location is important for your custom diecast cars. Display cases are a popular choice, protecting the models from dust and damage while showcasing them. Shelves offer another option, with the ability to arrange models in various configurations. Consider the lighting and how it highlights the details. Choose a location away from direct sunlight to prevent fading. Some collectors build custom dioramas to provide a more immersive display, adding a background and environment. Group models by type, theme, or scale. Regularly clean the display area to keep your models looking their best. A well-chosen display location enhances the appeal and protects your custom diecast car.
Protecting Your Collection
Protecting your collection is essential for preserving your custom diecast cars. Display your models in a dust-free environment to prevent dust accumulation. Use display cases with UV protection to prevent fading from sunlight. Handle the models with clean hands to prevent fingerprints. Avoid exposing the models to extreme temperatures or humidity. Regularly inspect your collection for any signs of damage or wear. Store any extra parts safely. Insure your collection if you have valuable pieces. Consider using archival-quality storage boxes for long-term storage. These measures will ensure the longevity of your collection.